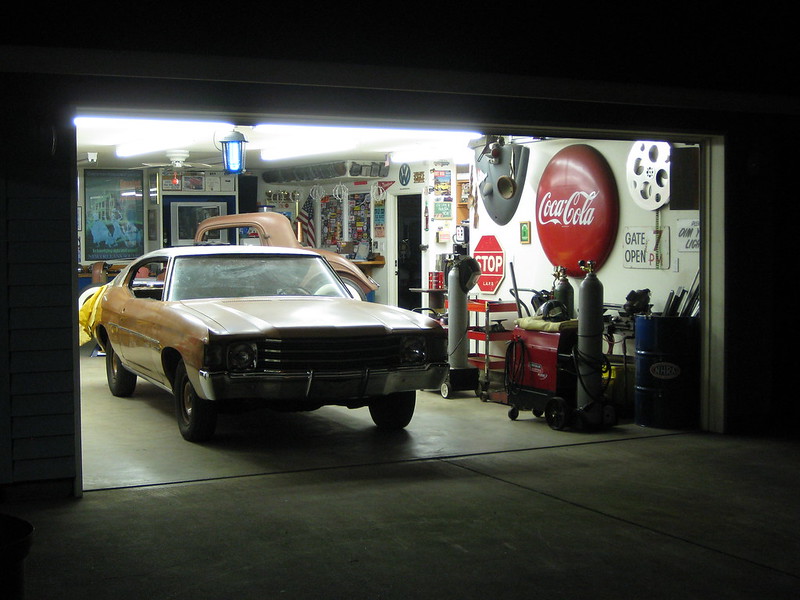
Day 79 - 5/25/12

Friday night, lets keep tearing it apart! Jacked up the rear, getting ready for rear brakes too. Since we're taking everything apart up front, this is a great time to take the springs out to cut them a little. Sits way to high.


Removing the sway bar end links to replace them and make room to take the springs out.

Ready for new parts!
 
Removed all the shocks because they're shot. I'll have to buy some of those too! Peter's working on his Civic in the background.

Day 78 - 5/22/12

Well, I got a little tired of the intense grinding, so we moved in another direction. The entire brake system and the front bearings need to be repacked, so we started on that. Today's Tuesday, so hopefully we'll be done this weekend.

Step one, jacker up!

The calipers where a little sticky, but they are the brakes so that made sense why.

Hopefully we can reuse the rotors and calipers, they seem to be in decent condition.

Got the bearings out, and they look great! The spindles look beautiful as well.

Both sides are in great condition for 40 years old!

I scooped out the majority of the grease out of the rotors, and then used our handy solvent tank to let every thing soak.

Last thing we did today was drain the master cylinder and remove it.

Day 77 - 5/20/12

Almost done with the metal work in the rear window. One last push after today will get it.


Day 76 - 5/7/2012

Time to get back to the rear window fabrication adventures! I got the vertical sides all spot welded and ground down, a very tedious task, that was both stressful and fun at the same time!

Got to grind it down so the vinyl top will sit flat!

Got all the paint stripped off. Used one of those 3M stripper wheel/pads to get in the crevices in preparation for filler and paint.


Kept working along the top area, it was real thin on the passenger side. Lower heat welds and titanium putty to come. Working around the lead was also a fun task! It had to be all dug out and welded underneath were it sat.

Also I keep stripping the original roof paint some more, being careful to not warp the thin sheet metal.

Day 74/75 - 4/27-28/12

Oh man where do I continue where we left off? It's been six months since an "update", but luckily I've been taking pictures since then. It's currently mid November 2012, and I've been dailying it since the end of July 2012. So yes, you could call it "done", but there is always something to do/fix. I'm not going to spoil it anymore so I'll just keep the story going where we left off in late April 2012...

Day 74: 4/27/12

My dad sourced some of this awesome stuff called titanium putty that he uses at work to fix molds. It has high build formula that dries hard and takes a grinder to form down. Great for fixing some thin pitty areas in my roof. 


We also used it around the windshield area to fill the seam a little where lead was originally.

Day 75: 4/28/12

Got that titanium putty ground down and dad gave the area along the passenger drip rail and the A-pillars a thin layer of filler. I learned that filled areas should be at least primed so less contaminates get in it. The primer really brought out what the roof skin will look like when it's all done! 


This area is still a little "green".


*Edit:* (Being made on 8/8/15) So after going through my brother's picture folders on the computer, I found some more pictures that Dad had taken with my brother's camera. Enjoy the update!

Continuing to work on the rear window...

Dad jumped on the roof and snapped some pictures of me sanding away.


There you guys go! And as usual, have a nice day.

New posts soon...

Lots of good progress has happened on the ol' Chevelle. Body work in the roof it really close to being done, brakes have been completely done, new shocks and coils cut up front. Tires have been sourced, and wheels need to be taken down from the attic. I will try to get some posts up in the next few weeks. (Posted on 5/28/12)
Thanks for keeping up, Ethan
Edit: Body work including fab, filler and epoxy is done on the roof. Black was painted around the lower parts of the glass openings. Glass is going in in about a week. We'll see you at Cruisin' the Gut!

Day 71/72/73 - 4/20-22/12

Very productive weekend we just had. Got the entire rear window channel in and almost all welded around. All the measurements I took before cutting the rust out helped the fitment of the metal a lot. I now have an almost done Monte/Chevelle hybrid. Friday evening:

Plug welded the area where the rubber will sit. All the tacks from last time.

Trying to see and hold it because I'm a lefty.

Calm cool Saturday night, Dad broke out the bug zapper and plugged it into the garage door plug.

Finished up the tacks Sunday.

We also got the last channel piece in, you can see the where the seam will be along the top.

Tried an electric angle grinder instead of the pneumatic grinder and it's more efficient. I'll use it along the rest of the opening. Monday the 23rd, ordered some molding clips from Dan's Classics because Gold Eagle was out. New vinyl for the top will be about $130.

     We're coming! Stay tuned...

Portland Swap Meet weekend 2012

For as long as I can remember, we have gone to the Portland Swap Meet. Same stall since the building opened and before that, Dad and Grandpa had a stall in the original Expo center building which is still there. I used to come on just Sundays but eventually and more currently, I come on all four days. It's fun to see all the old guys talk and see what everybody has to swap. Peter my brother and I sold some tools and that was the majority of our table this year.

See you next year!

Day 69/70 - 4/8 & 4/9/12

Easter Sunday is here again. Threw my new halogens in from Christmas (I don't know why it took me so long to put them in). All the hours spent polishing the bumper, headlight doors, and grille really set the front end off, I'm happy with it.

That's it, final fit of the front (except the passenger park light molding).

Day 70 - 4/9/12

Before: (roof skin along the passenger drip rail)

After: Dad brought home some titanium putty from work and it lives up to it's name! Took a grinder to sand it down!

Day 68 - 4/4/12

Back for some more Chevelle fun. Finally, we tackle the rear opening today. The "new" channel piece I ruffed out and ground down to fit was actually the correct size so we threw it in. Worked a little on my brakes today too.

Reinforcement made up. It's not the prettiest thing, but you won't see it.

Made the final measurements and got it tacked in!

We got the bigger piece in, now time to cut down the other side.

Cut down, still need to do a lot of fitting though.

In favor to keep the ball rolling, I jacked up the rig and took off the drums and shoes to get new linings put on. Grandpa helped out and took the parts to Ott's Friction Supply. The drums are a little over, but I'll run them with oversize linings. Anything is better than Chinese drums.

I have multiple service manuals but just to be on the safe side, I took a bunch of reference pictures to make sure and the springs and bracketry go back on correctly. Wouldn't want to forget one!

Cleaned up the springs and bracketry with our trusty parts washer. One of my favorite tools in the shop.

     See you soon..